Dyeing Yarn With Easter Egg Dyes
by Sonja Record of Sonja Kathleen Contemporary Knitting
Easter egg dye (Paas) is another safe, easy and fun way to dye yarn (for a similar method, see my article “Dyeing Yarn with Kool-Aid“). Like Kool-Aid, it requires no specialized equipment, and is safe enough to do with small children. Since it’s actually food dye, you can even use your kitchen utensils without fear of contamination.
Choosing and Preparing the Yarn
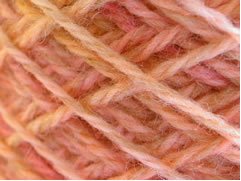
 Photo 1: Overdye using pink and orange dye over a tan/white 2-ply wool yarn (dip-dye method).To begin, you’ll need a quantity of wool yarn. One of the great things about wool (and other animal fibers) is that it takes dye so easily and so beautifully. It’s really pretty hard to get bad results. Plant fibers such as cotton can be more difficult to dye, requiring a dye solution with a base pH, so these instructions are for wool only.
The yarn you choose can be thick or thin, natural or dyed. If you choose a previously dyed yarn, you should select one in a fairly light shade, since you want the Easter egg color to show up. Overdyes often result in a more subtle, sophisticated color effect. For example, you could place tan yarn in a pink dyebath, the resulting color will be more of a dusty rose color than a bright pink color (see photo 1).
You should choose enough yarn to complete the project you have in mind, since it will be fairly difficult to duplicate the results exactly. If you think you might want to repeat a color in the future, then you’ll need to make notes regarding exact quantities, times, and temperatures of everything you do.
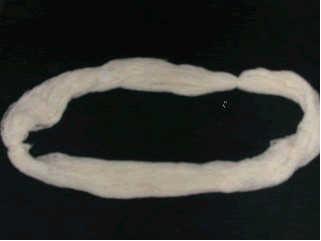
If you yarn comes in a center-pull skein, you’ll need to rewind it into a twisted skein or big loop to avoid the “tie-dye effect.” This allows the dye to come into contact with all parts of the yarn. (It’s amazing how protected the yarn at the center of a ball can be!) You’ll be handling the yarn a fair amount at rinse time, so tie the yarn in several places to avoid having a snarled mess when you’re done (see photo 2).

Photo 2: Looped skein tied in two places.
Pre-wet the yarn by soaking it in cool water for about 20 minutes, then squeezing it out. This allows for quicker, more even dye penetration. If you want to try for a mottled look, you can skip this step and start with dry yarn, but it will take longer for the dye to saturate the wool.
Choosing and Mixing the Dye
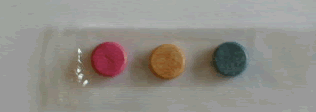
One of the main drawbacks to dyeing yarn with Easter egg dye is that it’s normally only available right around Easter. The best time to buy it is right after Easter, when many stores reduce the price dramatically in order to clear their inventory. Look for the kind that has color tablets (see photo 3), not paints or the cups that you just add water to. The brand I like to use is good old Paas (see photo 4), which actually says “pure food-color kit” right on the package. You can generally find these in 6 or 9-tablet sizes, and stock up when they sell for pennies on the dollar. If you have young children, they can have fun with all the other things that come in the kit.

Photo 3: Easter egg dye color tablets.The other drawback to dyeing yarn with Easter egg dye is that you can’t always tell what color the dye will be based on the color of the tablet, and the instructions don’t tell you. They just assume you’re going to make one cup for each tablet and will find out at that time what color it is. If you just want green, it may take you a couple of tries to find the green tablet. If you’re open-minded about the color you get, if you want to use all of them, or if you don’t mind wasting a tablet if it’s the wrong color, then you’ll probably have more fun with this method. You can also mix your own colors from the basic colors.

Photo 4: Package of Paas brand Easter egg dye. Note the everyday K-Mart price of $1.44. I bought this package for less than $.50 after Easter.
To mix the dye, follow the package instructions to dissolve the tablets. For Paas, you dissolve a tablet in 1 to 3 tablespoons of white vinegar. This also gives the dye bath an acidic pH, which is best for dyeing wool. After the tablet is dissolved, you add ½ cup of water to make the basic dye. You will then need to add enough water to cover the yarn you wish to dye, but this will dilute the color. I find that 1 or 2 tablets are enough to dye a sock-size amount of yarn in a light to medium color. I have even used what remains of the dye right after egg dyeing by diluting it with more water.
The colors themselves can be fairly bright (see photo 5), but there are several methods you can use to get more subdued results:
(1) Remove the yarn from the dye bath after a short time.
(2) Dilute the dye with more water than you need to cover the yarn.
(3) Use the overdye method by using a yarn that has already been dyed in a light color (see photo 6).

Photo 5: Basic colors on natural white yarn (dip-dye method).

Photo 6: Overdye of blue and green dyes over pale green yarn (dip-dye method).
The entire process is subject to a fair amount of trial-and-error, but that’s where the fun is.
Jar Method
I prefer to use the jar method instead of the baggie method with Easter egg dye since it can be a little messy. I like to do this in my kitchen with a layer of newspaper, plastic, paper towels or whatever on the counter, since Easter egg dye will stain and can be hard to scrub off. Wear gloves if you don’t want to dye your fingers (it wears off after a couple of days).
Mix the dye in a firm container that’s large enough to hold all your yarn. I like to use large glass jars for socks, but you can even use your pots and pans for larger quantities. The container can be glass, metal or plastic, but the plastic will be stained. Add the yarn and enough water to cover it. Let it sit until the dye is exhausted, which may take anywhere from several minutes to several hours. The dye bath is exhausted if all the dye adheres to the yarn, leaving virtually clear water behind.
If you like the color after only a short time, by all means remove the yarn from the dye and finish processing it. Remember that some of the color will rinse out, and the remaining color will probably dry a shade or two lighter.
After the dye bath, you can simply rinse the yarn in cool water, squeeze out the excess water, and hang the yarn to dry, or you can “cook” it to further set the color. To do this, place the yarn in a baking pan in the oven at 200 degrees for about 10 minutes. After removing the yarn from the oven, allow it to cool to room temperature before rinsing in cool water and drying. This avoids temperature shocking the yarn, which could result in unwanted felting or shrinkage.
This method will result in a single-color yarn, possibly with some variation in color saturation. If you’re not happy with it, you can re-dye it with the same or another color, or use the dip-dye technique described below.
Dip-Dye Method
The dip-dye method will allow you to use two or more colors on the yarn. Keep in mind when you select the colors that they will overlap and form a third color for a short area. So, if you choose blue and yellow, you will also have a section of green where these two dyes blend.
Use a separate container of the same height for each dye color. I find that tall jars work very well. Add the dye, place the jars right next to each other, and put half the yarn in each jar (see photo 7). If the section of yarn that’s out of the dye remains uncolored, you can “rotate” it part way through the process. Proceed as for the rest of the jar method.

Photo 7: Dip-dye method for 2 colors. This example shows way too much yarn for this set-up, but you get the basic idea.
